You’re a Repairperson!
You’re a Repairperson!
Objective:
Students will learn about the basic electronic components in a laptop, understand their purpose, recognize symptoms when they fail, and apply this knowledge to troubleshoot, diagnose, and fix common issues.
Deliverable:
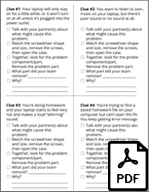
Completed clue cards
Core Concepts:
Engineering Design
Troubleshooting
Repair
Circular Economy
Sustainability
Standards Correlations:
This activity correlates to the following Next Generation Science Standards. These standards incorporate the Common Core Literacy Standards. This activity may correlate to other standards, but these are the best fit:
NGSS Engineering Design - Performance Expectations:
3-5-ETS1. Define a simple design problem reflecting a need or a want that includes specified criteria for success and constraints on materials, time, or cost.
3-5-ETS1-2. Evaluate competing design solutions using a systematic process to determine how well they meet the criteria and constraints of the problem.
Materials:
Presentation Notes/Slides: Slideshow presentation
Activity Materials:
Devices to take apart
Tools to aid in disassembly
Diagnosis Clues (cut outs)
Room Arrangement/Space Requirements: Pods of desks or large tables where groups of 2-4 students can work together.
Technology Requirements: laptop and projector
Procedures:
Activity #1: Warm-up Activity (present in slides)
Estimated time: 5 minutes
Step-by-Step Instructions:
Ask the students:
Have you ever broken something? Did you try to repair it? Did someone else repair it? If not, why not?
If you didn’t repair it, what happened to the broken object?
Activity #2: You’re a Repairperson!
Estimated time: 45-60 minutes (depending on how many clues students work through)
Step-by-Step Instructions:
Use the slide presentation to introduce the activity.
Break the students into groups of 2-4.
Pass out a clue to each group. Have each group discuss which failed component would cause the described symptom.
Pass out a device and tools to each group.
Ask the students to open their devices, locate the problem component outlined on their clue cards, then remove it.
Remind students that they’ll have to put the device back together once they’re done with the activity.
Depending on time constraints, once students remove their first problem component, either give them another clue to work on or ask them to begin reassembly.
Discussion Topics:
Was opening your device and replacing the component easier or harder than you thought it would be? Why?
What did you discover about how electronic devices are assembled/designed?
Do you feel more confident in repairing your own electronics after this activity?
If an electronic breaks, what are some things we can do instead of throwing it away?
Other Resources:
iFixit.com/right-to-repair: iFixit’s resources on repair and sustainability
edu.iFixit.com/k-12: iFixit’s K-12 education site
iFixit.com/teardown: Examples of teardowns that have repairability scores
nextgenscience.org: Next Generation Science Standards site
Screwdriver Best Practices: Tips and tricks to properly use screwdrivers
Recognizing and Disconnecting Cable Connectors: Explains how to identify and disconnect the most common connectors in electronics
Identifying Major Electronic Components: A more comprehensive explanation of major electronic components
How to Remove Stripped Screws: Accidents happen, and this handy guide demonstrates how to remove stripped screws


