

Write Guide Introductions
Now that you’ve finished your guides, you’ll need to fill out the “Introduction” sections. Guide introductions should contain any background information a reader would need before they begin the repair.
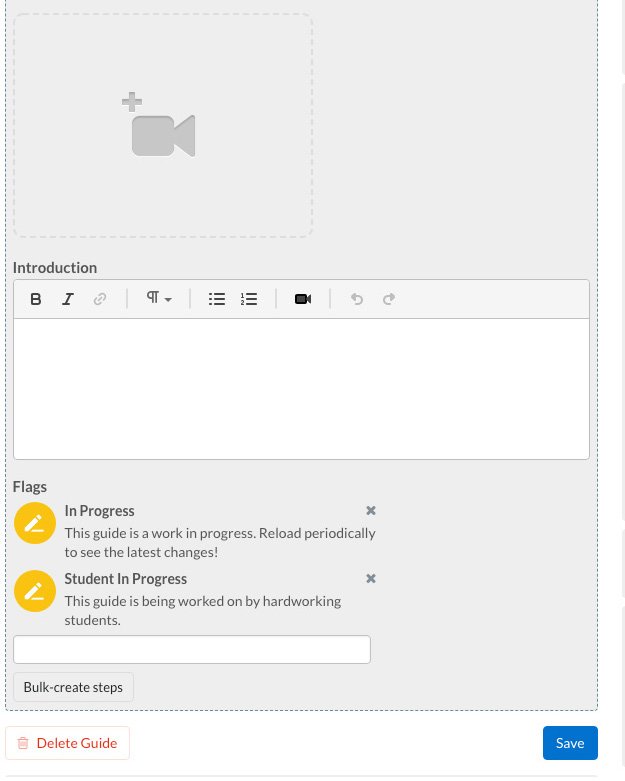
To access the “Introduction” field, click on the Introduction tab at the top of your guide’s Edit screen. Then scroll down to find the “Introduction” field (it’s below the video camera icon and just above the “Flags” section).
basic information
All guide introductions should include the following information:
Full device name and model number
Alternate names and model numbers (if applicable)
What is being accomplished by the guide
Any important information about the part being replaced including an explanation of what the part does
A description of the device’s symptoms with links to relevant section(s) in your troubleshooting page
Any tips or warnings related to swollen batteries, shattered glass displays, damaged waterproofing, removing power/disconnecting batteries, hard drive backups, ESD-safe tools, proper device disposal, and anything that could be potentially harmful
Links to outside resources or articles where relevant
Special Skills
Some replacement guides require special skills. Here are some examples of special information to include in the introduction. Make sure to link to any applicable guides in your introduction and any relevant guide step(s).
What not to include in your introduction
Warnings about voiding warranties
Telling users to “Keep track of screws” or “Keep screws in a safe place”
Listing information already in the “Details” section, such as parts, tools (unless they require special expertise like the tools listed above), time required, and prerequisites
Examples
Wondering what a good introduction looks like? Here’s an example of a solid introduction:
If your ZTE Tempo smartphone (model 9131) isn’t producing clear audio—distorted, intermittent, or no sound—through headphones or auxiliary speakers, use this guide to replace the headphone port (also known as a jack).
The headphone port transmits audio to external speakers through an auxiliary cord. A faulty headphone port will transmit distorted audio or no audio at all.
Before using this guide, inspect the headphone port for debris that may be interfering with sound quality. Typically, a small buildup of dust can be removed using an ESD-safe brush or small dust blower. Be sure to test a few sets of headphones or auxiliary cords with your device to confirm that the faulty part is coming from the ZTE Tempo’s headphone port.
Step 5 requires you to remove the circuit board from the device. From there, you will need to desolder the surface-mounted headphone jack and solder a new one in place.
Before beginning, make sure to power off your phone completely and disconnect from any external power source.
Check out the guide introductions from these past projects for more good examples:
YOU SHALL NOT PASS...

...until you review the guidelines of the milestone carefully. There are a lot of tricksy little hobbit-sized details in this milestone that you don’t want to miss. Make sure you’ve got a good pair of elf-eyes on your guides before you email us at techwriting[at]ifixit[dot]com with your finalized drafts. We’ll let you know when it’s safe to cross into Milestone 4.